As Halloween approaches, many people start to think about creative ways to elevate their festive spirit. One fun way to do this is through nail art. Cute French tip Halloween nails can be a subtle yet stylish way to celebrate the spooky season. Why not add a twist to the classic French tip design? Here are some imaginative ideas that will make your nails the talk of the party!
Classic French Tips with a Spooky Twist
Start with the classic French tip by painting your nails with a soft nude or light pink base. For the tips, you can swap traditional white for colors like black, orange, or even glow-in-the-dark polish. This delivers an elegant look with a Halloween flair:
- Black tips: Perfect for a gothic vibe.
- Orange tips: A festive touch that screams Halloween.
- Glow-in-the-dark tips: Become the star of the night when the lights go down!
Halloween-Themed Nail Art
If you’re feeling more adventurous, consider adding Halloween-themed designs to your French tips. You can bring in elements like ghosts, pumpkins, or bats:
- Ghost Faces: Paint tiny ghost faces on the tips; they’ll look cute yet spooky!
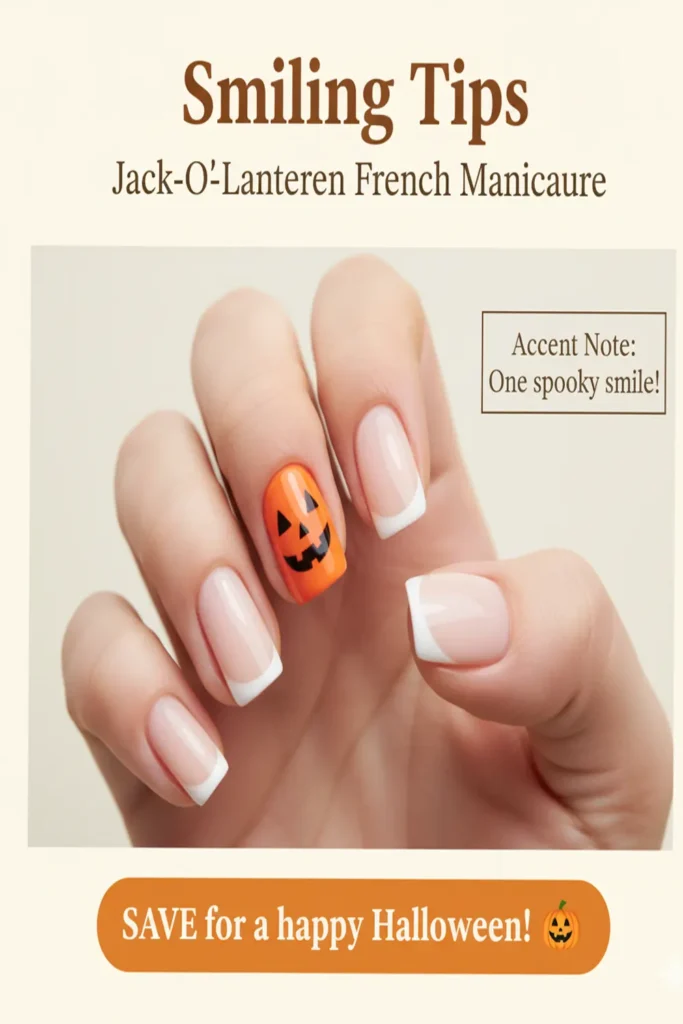
- Mini Pumpkins: Add little orange pumpkins on one or two nails for an autumn vibe.
- Bats: A tiny bat silhouette on the nails can add an eerie touch.
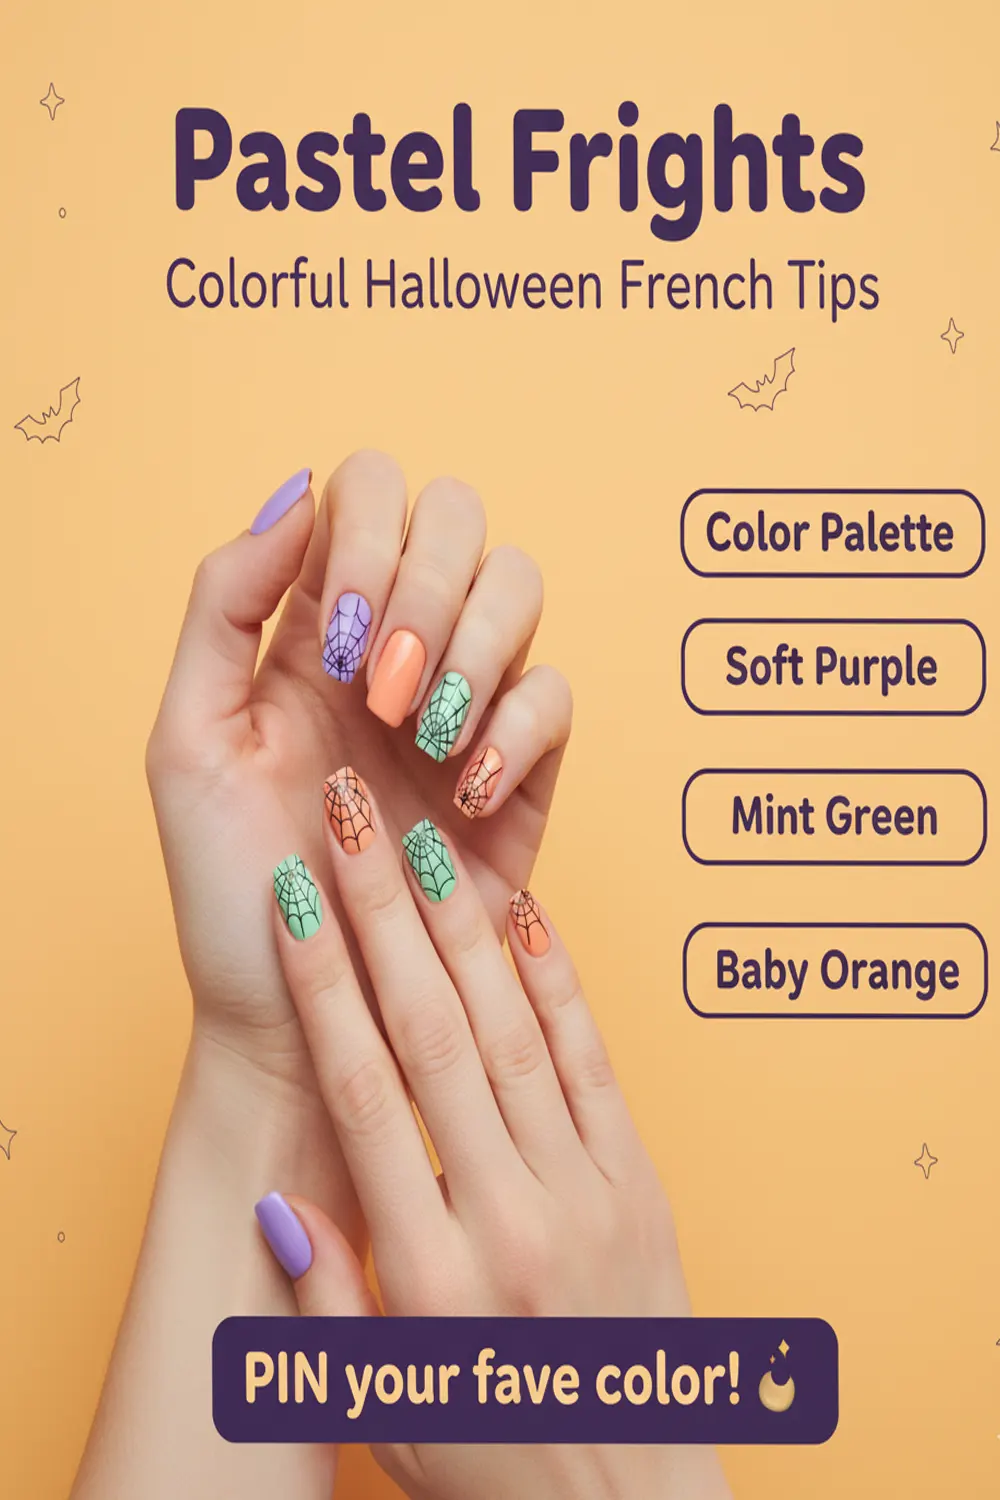
Pastel Halloween Vibes
Not everyone likes the traditional Halloween color palette. For a softer approach, consider using pastel colors. Light shades of purple, green, and pink can set a fresh tone while still embodying the spirit of Halloween:
- Pastel Purple Tips: Pair with delicate spider web designs.
- Pale Green Tips: Combine with tiny skeletons or witch hats.
- Pastel Pink Tips: Adorn with little candy corn designs.
Trendy Textures
Textured nails are gaining popularity, and Halloween is the perfect occasion to incorporate them. Here are some ideas:
- Matte Finish: A matte topcoat for your tips makes them look more stylish and modern.
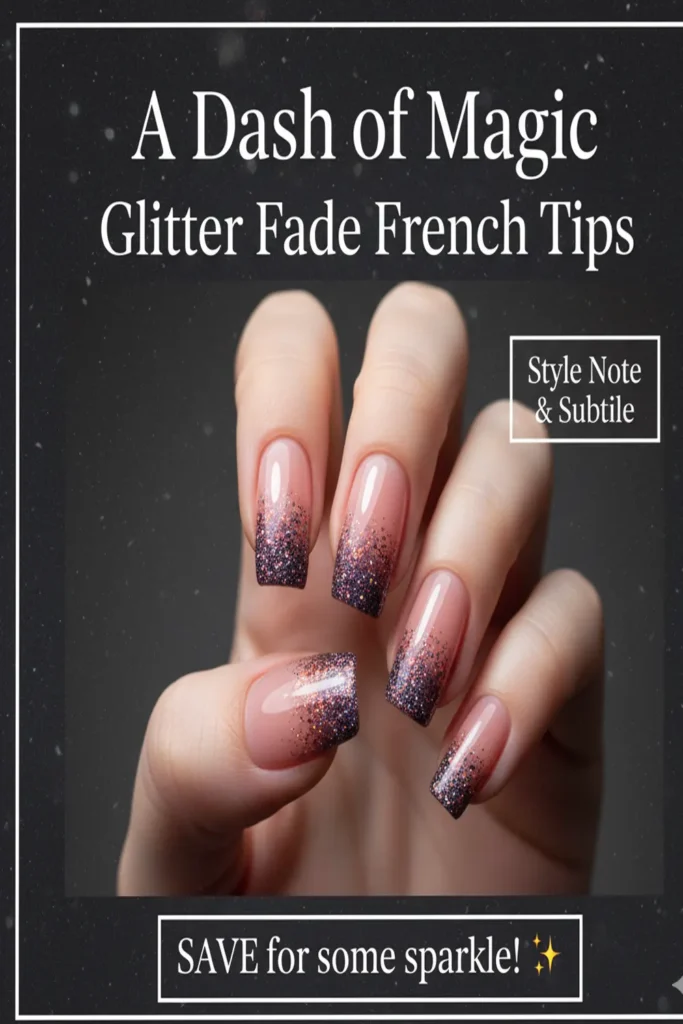
- Glitter Tips: Add a touch of shimmer to your Halloween tips with glitter polish.
- Watercolor Effect: Blend colors for a dreamy effect that feels hauntingly beautiful.
Combine with Nail Accessories
Adding accessories can enhance your cute French tip Halloween nails. Consider using:
- Nail stickers: Easy to apply and come in various Halloween-themed designs.
- Rhinestones: For a glamorous touch, add little gems to accentuate your French tips.
- Nail jewels: Cute charms in pumpkin or spider shapes can be a playful addition.
DIY Tips for the Perfect Look
When creating your Halloween nails, here are some tips to ensure they turn out perfect:
- Start with a Base Coat: This helps your nails stay healthy and your polish last longer.
- Use Striping Tape: For perfectly straight lines when applying French tips.
- Experiment and Have Fun: Don’t be afraid to try different designs until you find your favorite!
For inspiration, you can check out Nail It Magazine for the latest trends in nail art.
You may also want to visit Chalkboard Nails for unique DIY nail art ideas.
Cute French tip Halloween nails are the perfect way to blend festive spirit with stylish elegance. Whether you prefer a classic look or something more playful, your nails can speak volumes about your Halloween mood!
Trending Halloween Nail Colors and Inspirations
As Halloween approaches, it’s the perfect time to get creative with your nail designs. This season, bold and playful nail colors are trending, making it easier than ever to express your festive spirit. From spooky themes to Halloween-inspired colors, you have a wide range of options to choose from. Here are some of the most popular colors and inspirations to try this Halloween.
Classic Halloween Colors
When imagining Halloween nails, certain colors come to mind instantly. These classic shades not only evoke the spirit of the holiday, but they also lend themselves to a variety of nail art designs. Here’s a list of must-have colors:
- Black: Always a favorite for Halloween, black nails can create a dramatic look.
- Orange: This vibrant color embodies the essence of Halloween pumpkins and festive decor.
- Purple: A gothic undertone makes purple a popular choice, symbolizing mystery and magic.
- Green: Think of the classic witch’s potion! Green adds a playful twist to any design.
- Red: The color of blood and apples brings a bold edge to Halloween nails.
Trending Nail Art Designs
Besides the colors, the style of nail art is incredibly important. Here are some trendy designs that you might consider:
1. Halloween French Tips
A cute twist on the classic French manicure can be perfect for fall. You can switch up the traditional white tips with spooky themes. For example:
- Black tips on an orange base
- Deep purple tips on a nude or light grey background
- Glittery gold tips pairing with a dark red base
2. Ghosts and Ghouls
Simple ghost outlines and little ghouls painted on a few accent nails can add a whimsical touch to your look. Using a white base for the ghosts can make them pop against darker backgrounds.
3. Glitter and Glam
Using glittery polishes is a great way to shine bright during Halloween. Opt for sparkling top coats to give a hint of festivity without being too over the top. A touch of glitter over a dark base can look stunning!
4. Nail Stickers and Decals
If you prefer to keep it simple, consider using Halloween-themed stickers or decals. These can come in the form of spiders, bats, or pumpkins that you can easily apply to your nails!
Popular Nail Color Combinations
Mixing and matching different colors can create unique looks! Here are some popular combinations that work well for Halloween:
| Main Color | Accent Color |
|---|---|
| Black | Gold |
| Orange | Purple |
| Red | White |
| Dark Green | Silver |
Where to Find Inspiration
There are countless resources available where you can find Halloween nail inspiration. Check out these websites for ideas:
- Nail Art Designs – Offers a gallery of Halloween nail art ideas.
- Instagram – A great platform for discovering trending designs by nail artists.
- Pinterest – A treasure trove of DIY nail art tips and designs.
Caring for Your Halloween Nails
After creating your stunning Halloween nails, it’s essential to take good care of them. Regular moisturizing and applying cuticle oil can keep your nails healthy and looking fresh. Always use a base coat to protect your natural nails from staining, especially when using bold colors.
With these colors and design ideas, you’ll be ready to show off your Halloween spirit in style. Have fun experimenting with different styles, and don’t hesitate to mix and match to find your perfect look!
DIY Techniques for Achieving Flawless French Tip Nails
Creating flawless French tip nails at home can be an enjoyable and rewarding experience. With the right techniques and a few tools, you can achieve salon-quality results without stepping foot outside. Here’s a concise guide to help you on this nail art journey.
Gather Your Tools
Before you start, make sure you have all the necessary tools at hand. Here’s a handy list:
- Nail polish remover
- Base coat
- White nail polish
- Top coat
- Nude or light pink polish
- Nail tape or stencils
- Nail file and buffer
- Dotting tool or fine brush (optional)
Prep Your Nails
Proper preparation is key to long-lasting and beautiful nails. Follow these steps:
- Start by removing any old nail polish with nail polish remover.
- Shape your nails to your desired length and file the edges for a smooth finish.
- Gently push back your cuticles and buff the surface of your nails.
- Wash your hands thoroughly to remove any dust or residue.
- Apply a base coat to protect your nails from staining and ensure the polish lasts.
Master the French Tip Technique
Achieving that classic French tip look requires precision. Here’s how to do it:
1. **Create the Tip:** If you’re using nail tape or stencils, apply them securely along the tip of your nail. Ensure they are perfectly straight for an even look.
2. **Polish Application:** Using the white nail polish, paint over the tip of your nail. Keep the stroke steady for a clean line. Allow the polish to dry completely before removing the tape or stencil.
3. **Refine the Design:** If you prefer freehand techniques, use a fine brush or a dotting tool dipped in white polish to draw a delicate line at the tip.
Finish Your Look
Once the white tips are dry, it’s time to complete the manicure:
- Applying a nude or light pink polish to the rest of your nail. This base will enhance the contrast with the white tip.
- Once the nude polish is dry, you can touch up the tips if needed, ensuring a crisp look.
- Seal everything with a top coat. This will add shine and extend the wear of your manicure.
Before You Go
After letting your nails dry completely, here are a few final tips:
- Clean up any mistakes using a small brush dipped in nail polish remover.
- Avoid soaking your nails in water for at least an hour to ensure the polish sets properly.
- For durability, reapply a top coat every few days.
Explore Further Techniques
French tips can be adapted with different colors and designs to match any occasion. For additional ideas and tutorials, you can check out the following resources:
- OPI – Great for professional nail art techniques.
- Nail Art Designs – Offers plenty of creative possibilities.
- Essie – Known for its stylish and trendy nail polishes.
With these techniques, you can confidently take on your DIY French tips to impress your friends or simply enjoy radiant nails on your own. Remember, practice makes perfect, so don’t hesitate to try and tweak your techniques until you find your perfect French tip style!
The Role of Nail Art in Halloween Festivities
Nail art has become a significant element of Halloween festivities, helping to elevate the spirit of this spooky season with creativity and flair. As many people prepare for exciting Halloween parties, the desire to express their style and embrace the theme of the holiday can be seen through their nail designs. With imaginative designs and colors, nail art transforms simple manicures into statement pieces that perfectly complement costumes.
One of the most engaging aspects of Halloween nail art is its versatility. You can opt for subtle designs or go all out with intricate themes. Here are some popular nail art ideas for Halloween:
- Classic Pumpkin Nails: Using orange polish with green accents, you can create adorable jack-o’-lantern faces on your nails.
- Spooky Ghosts: White nail polish with small black dots representing eyes can lend a playful ghostly look.
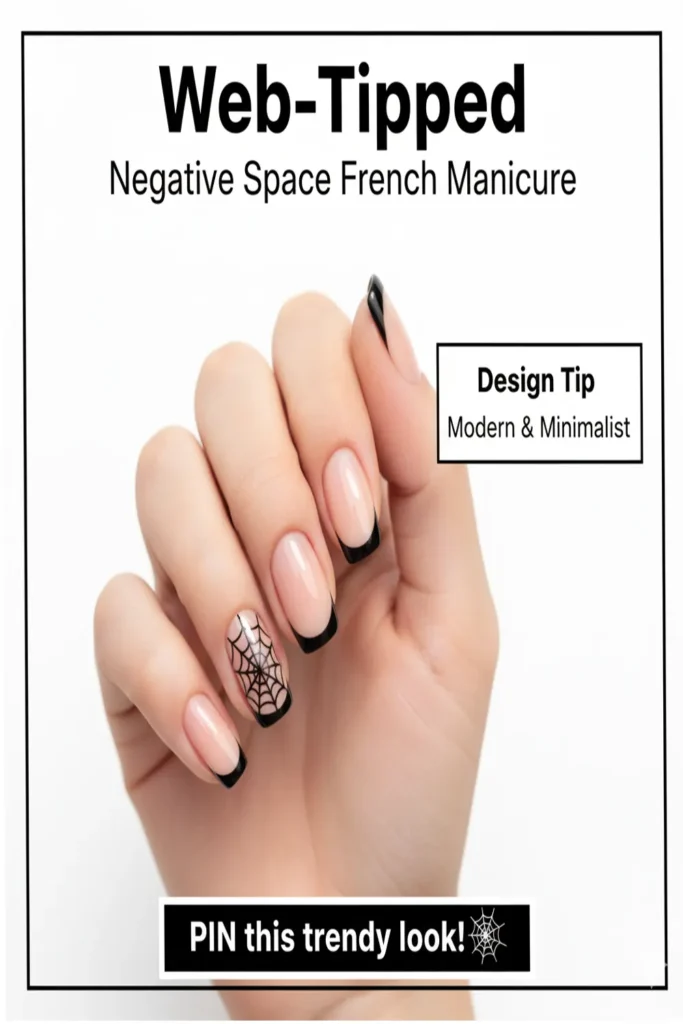
- Webbed Manicure: Black polish topped with silver or white spider web designs adds a charmingly eerie touch.
- Witch Tips: Dark green or purple nail polish along with glossy black tips can give your nails a bewitching look.
- Cute Skulls and Bones: Whether you prefer adorable cartoon skulls or more realistic bone motifs, these designs can be a fantastic focal point.
Not only does nail art express festive spirit, but it also stands as a reflection of personal style. Some people may prefer to keep their nails simple yet elegant, while others thrive on playing around with over-the-top designs. Here’s how you can nail your Halloween manicure:
- Choose a Theme: Identify the theme for your outfit and ensure your nail art complements it. Whether you’re going for a traditional vampire look or a whimsical fairy costume, your nails should align with your overall aesthetic.
- Use Quality Products: For long-lasting effects and vibrant colors, select reputable nail polishes and art supplies. Brands like OPI and Essie provide a range of colors suitable for the season.
- Incorporate Nail Accessories: Utilize stickers, gems, and decals for added flair. These embellishments can quickly elevate your design without trying too hard.
If you’re unsure where to start, consider seeking inspiration from social media channels like Instagram and Pinterest. Many nail artists share simple tutorials and step-by-step guides on how to execute iconic Halloween designs. This way, you can follow along and create your spooky masterpiece! For more design ideas, check out Nail Art Gallery, which showcases a variety of art from talented creators around the world.
Moreover, the impact of nail art in Halloween festivities extends beyond personal expression. Many nail salons host special events during October, offering nail art workshops focused on Halloween themes. This not only encourages community engagement but also promotes local businesses as they harness the spirit of the season. Events like “Nail Art Nights” invite nail enthusiasts to gather and learn new techniques while celebrating this spooky time of year.
Additionally, integrating nail art into Halloween festivities can be a fun way to bond with friends or family. Why not host a nail painting party as part of your own Halloween celebration? Gather supplies, pick a theme, and enjoy an evening of creativity and camaraderie. The atmosphere of group creativity enhances the festive feeling, with everyone sharing tips and ideas.
Don’t forget about the growing trend of temporary nail art such as nail wraps and stickers. These options provide an easy, low-commitment way to achieve stunning nail designs without the need for professional tools or skills. You can simply peel and stick, allowing for quick changes to suit your Halloween spirit.
Indeed, the role of nail art in Halloween celebrations is significant. It’s a wonderful way to showcase creativity, express personal style, and enhance your overall Halloween experience. Head over to Hello Giggles for more inspiration on Halloween nails that will definitely grab attention.
Tips for Long-Lasting Halloween Nail Designs
Creating long-lasting Halloween nail designs can elevate your festive spirit and keep your manicure looking fabulous throughout the spooky season. Here are several effective tips to ensure your Halloween nail art stays intact and vibrant for the entire celebration.
Choose Quality Products
Start with the right materials. High-quality nail polish can make a big difference in durability. Look for chip-resistant formulas that can withstand the wear and tear of daily life. Brands like Essie and OPI offer excellent options for rich colors and longevity.
Prep Your Nails
Preparing your nails properly goes a long way in ensuring your designs last longer. Follow these steps for optimal results:
- Remove any old polish: Make sure your nails are clean and free from any remnants of previous manicures.
- Shape your nails: Use a nail file to shape your nails as you prefer, whether that be square, oval, or stiletto.
- Buff the surface: Gently buff your nails to create a smooth canvas for your polish.
- Push back cuticles: This keeps your nails looking clean and allows for smooth polish application.
Apply a Base Coat
Don’t skip the base coat! A good base coat not only protects your nails from staining but also provides a sticky surface that helps polish adhere better. Look for a base coat designed to extend wear time. Brands like Seche offer fast-drying options that work wonders.
Layer Your Colors
When applying your Halloween designs, layering can enhance both color depth and durability. Here’s how:
- Apply a thin coat: Start with a thin base layer of color; allow it to dry completely before proceeding.
- Layer with nail art: Use nail art pens or brushes to add spooky designs such as ghosts, pumpkins, or cobwebs.
- Seal it with a top coat: A high-quality top coat is crucial as it locks in your designs and adds extra shine.
Mind Your Eating and Activities
Be conscious of the activities and foods that could negatively impact your manicure. If you’re planning to do cooking or any hand-intensive tasks, consider using gloves to protect your nails. Additionally, steer clear of foods that can stain, like berries or sauces, to preserve your manicure’s appearance.
Use Quick-Dry Spray or Drops
While waiting for your nails to dry, use a quick-dry spray or drops to set your polish faster. This can help minimize the chances of smudging or denting your artwork. Look for sprays from brands like Nails Inc for effective options.
Maintain Your Manicure
To encourage longevity, regularly maintain your nail art. Apply a layer of top coat every few days to keep your designs fresh and shiny. If you notice chipping, use a fine brush to touch up the color before applying the top coat.
Consider Nail Wraps or Stickers
If you’re short on time, consider using Halloween-themed nail wraps or stickers. These offer an easy way to spruce up your nails without the intricate painting. They are also ideal for those who may not feel comfortable painting designs by hand. Brands like Essie and Artistic Nail Designs provide fantastic options for festive wraps.
Know When to Remove and Reapply
Know when it’s time to remove any chipping or damaged polish. Waiting too long might lead to further damage, so don’t hesitate to take it off and start afresh. Regular application and removal can actually benefit the health of your natural nails!
Following these tips will ensure your Halloween nail designs not only look fabulous but last throughout the spooky season. Happy painting and enjoy showing off your festive flair!
Key Takeaway:
When it comes to celebrating Halloween, embracing festive spirit through your nail art can be both fun and expressive. This article provides you with a comprehensive guide on how to achieve cute French tip Halloween nails that stand out and enhance your celebration. Here are the key takeaways from the discussed topics:
Creative Designs for Cute French Tip Halloween Nails
Halloween nails are not just about traditional dark colors or spooky symbols. You can mix the classic French tip with Halloween charms, transforming simple nail designs into eerie yet adorable art. Think of incorporating motifs like miniature pumpkins, spider webs, or even little ghosties at the tips. Your creativity can bring a fresh twist to the classic French manicure.Trending Halloween Nail Colors and Inspirations
Color choice plays a crucial role in your nail art for Halloween. While black and orange remain staples, consider vibrant variations like candy corn yellow, deep purple, and metallic silver for a trendy look. These shades can add an exciting pop of color to your French tips, drawing inspiration from Halloween themes while keeping the design cute and stylish.DIY Techniques for Achieving Flawless French Tip Nails
You don’t need to visit a salon to get a polished look! DIY techniques such as using tape for clean lines or a brush for precision can help you achieve those flawless French tips. Additionally, using high-quality nail polish and a steady hand can further enhance your results. It’s about making the process as enjoyable as the end result!The Role of Nail Art in Halloween Festivities
Nail art, especially for occasions like Halloween, serves as an extension of your personal style and creativity. It allows you to express your spirit, whether you’re dressing up for a party or simply enjoying the season. Cute French tip Halloween nails can be a conversation starter and add an extra charm to your costume or outfit.Tips for Long-Lasting Halloween Nail Designs
To ensure that your Halloween nail art remains vibrant throughout the festivities, consider applying a good base coat to protect your nails and seal your artwork with a top coat. Avoid washing your hands too frequently without gloves post-application to keep your nails looking fresh for longer. With a bit of care and some thoughtful design choices, you can enjoy cute French tip Halloween nails that are both stylish and spook-tacular!Embracing cute French tip Halloween nails allows you to express your festive spirit in a fun and creative way. With the right designs, colors, DIY techniques, and maintenance tips, you can effortlessly shine during this festive season!
Conclusion
As Halloween approaches, the excitement for fun and creative expressions of style heightens, and cute French tip Halloween nails are a perfect way to celebrate. With a variety of imaginative designs—from spooky ghost motifs to playful pumpkin accents—there’s something for everyone to love. Taking inspiration from the trending colors of the season, such as deep oranges, rich purples, and eerie blacks, you can easily elevate your nail game while embracing the spirit of Halloween.
For those feeling adventurous, DIY techniques allow for a personal touch. With the right tools and a steady hand, you can create flawless French tips that showcase your unique flair. Nail art is not just an accessory; it plays a significant role in Halloween festivities, helping to set the mood and express creativity. Whether you’re attending a party, trick-or-treating, or simply enjoying the season, having well-designed nails adds to the overall fun.
To ensure your spooky nail designs last throughout the festivities, remember to apply a good topcoat and follow care tips that keep chipping at bay. With proper techniques and a bit of creativity, your cute French tip Halloween nails can shine brightly at any Halloween event, making you the center of attention. Embrace the season, let your nails reflect your unique personality, and enjoy the celebration with style!