As Halloween approaches, many people find joy in celebrating the spooky season with fun and creative designs. One of the easiest ways to express your Halloween spirit is through cute nails. From playful patterns to colorful nail art, there are endless possibilities to ensure your nails stand out. This article explores some imaginative ideas for cute Halloween nails that will have you excited to show off your festive flair.
Adorable Halloween Color Palettes
To get started, consider the classic Halloween colors that can inspire your designs. Your nails can embody the spirit of the season by choosing from:
- Purple
- Black
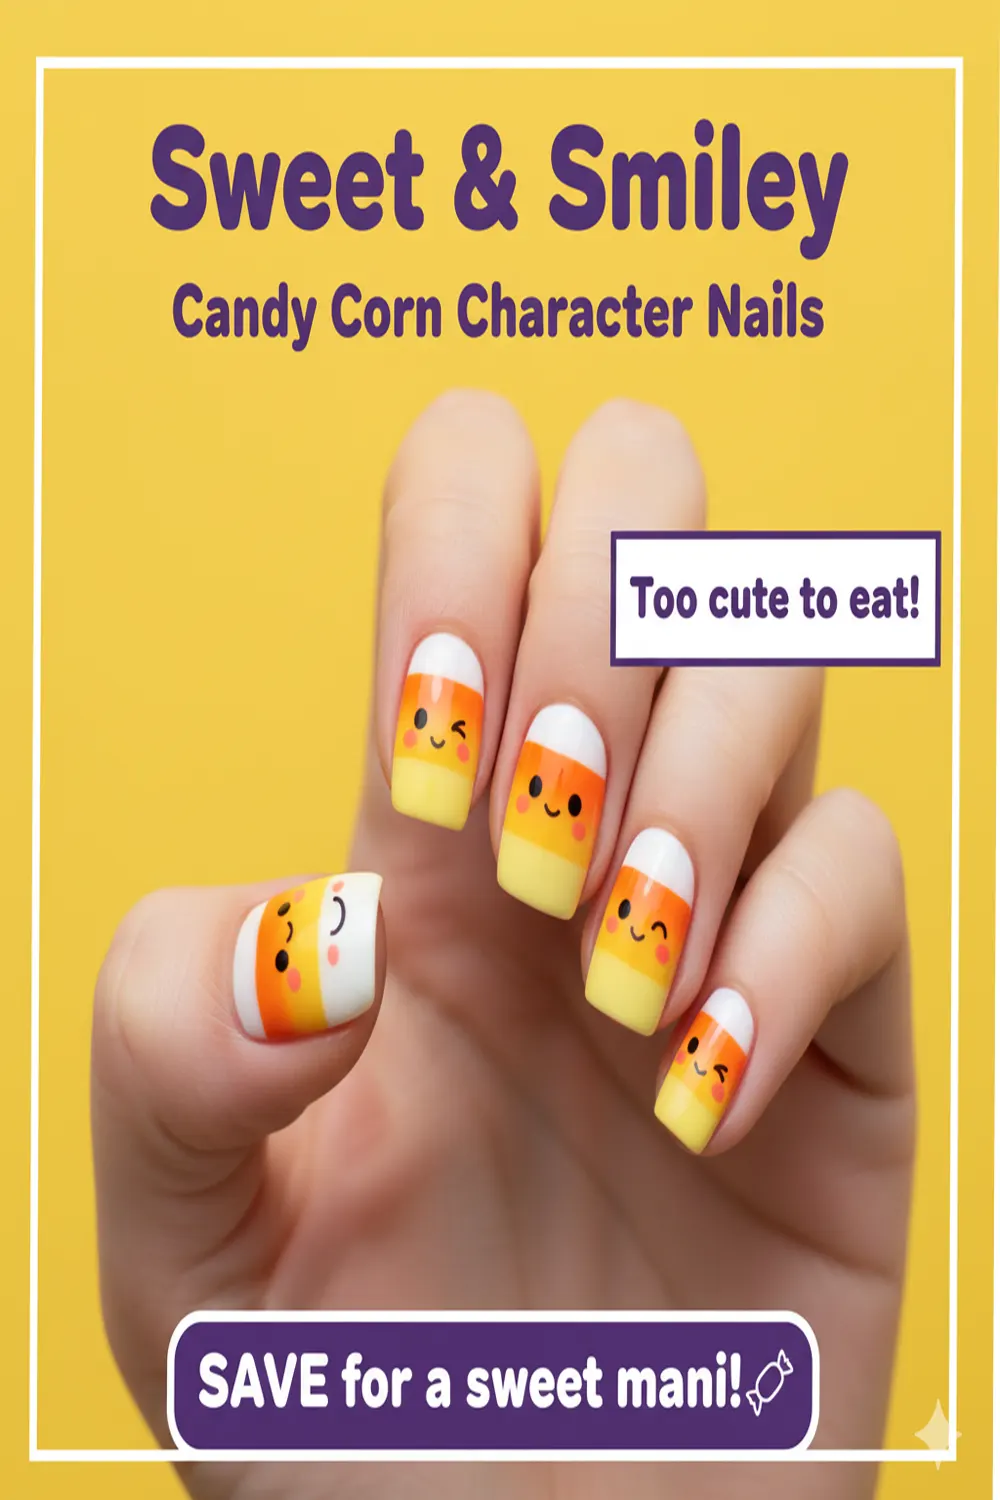
- Orange
- Green
- White
By combining these colors in various ways, you can create a nail art masterpiece. For instance, using purple as a base and adding black and orange accents creates a whimsical look that is both cute and festive.
Fun Pumpkin Patterns
Nothing says Halloween quite like pumpkins! Here’s how to incorporate pumpkins into your nail designs:
- Use an orange base on your nails.
- Create jack-o’-lantern faces using a fine nail brush and black polish.
- Add a glossy top coat for extra shine.
These playful pumpkin designs will bring smiles and compliments your way!
Sweet Spiderwebs
If you want to lean into the spooky vibe without being too frightening, spiderwebs are a great option. They can add a touch of elegance to your cute nail art:
- Choose a light base color like pink or lavender.
- Use a thin brush to draw spiderweb patterns with white or black polish.
- Finish it off with a small black dot for a spider, if desired.
This design is simple yet charming, making it perfect for both young and adult nail artists alike.
Ghostly Goodness
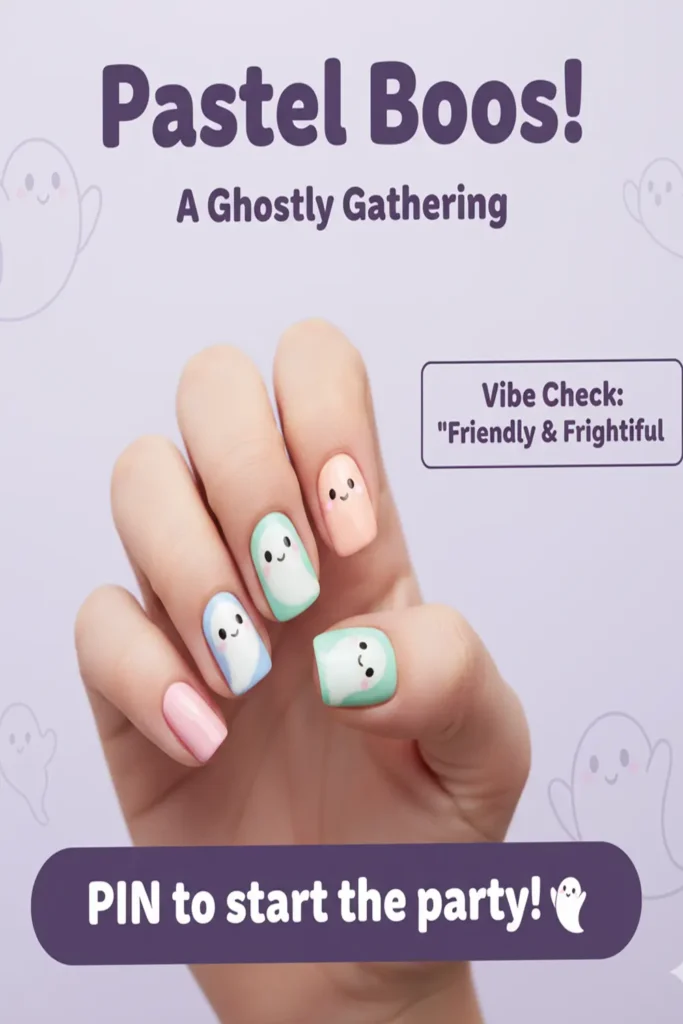
Ghosts are another classic symbol of Halloween, and they can be turned into adorable nail art:
- Use a white polish as your base coat.
- Add tiny black eyes and mouths using a dotting tool.
- Top with a matte finish for a cute touch!
These little ghost faces will have everyone saying “Boo-tiful!”
Glossy Glitter Effects
What’s a celebration without a little sparkle? Adding glitter can be the perfect finishing touch for your Halloween nails:
- Select a glitter top coat to apply over your base color.
- Choose themed glitter shapes like bats or stars for added charm.
- Use a clear base coat to seal everything in place.
This shimmering design can easily elevate any cute Halloween nail art.
Decorative Nail Accessories
For those who love a little more bling, consider using nail accessories to enhance your designs:
- Nail stickers featuring Halloween-themed designs like witches and bats.
- Rhinestones in various shapes to create 3D effects.
- Faux nail piercings for a trendy edge.
These accessories can make your nails even more captivating and personalized.
For more creative nail ideas, consider visiting Nail Art Designs or Nail Pro. These sites provide endless inspiration for cute nails for any occasion, including Halloween.
| Design Name | Colors Used | Key Features |
|---|---|---|
| Pumpkin Pattern | Orange, Black | Jack-o’-lantern faces |
| Sweet Spiderwebs | Pink, Black | Thin web designs |
| Ghostly Goodness | White, Black | Adorable ghost faces |
| Glossy Glitter Effects | Various | Shiny glitter top coat |
| Decorative Nail Accessories | Any | Stickers, rhinestones |
Get creative and experiment with these ideas for cute nails for Halloween. With the endless options available, you are sure to find a design that resonates with your personality and festive spirit. Don’t forget to incorporate your favorite elements and share your creations on social media to inspire others to embrace the Halloween vibe!
Essential Nail Care Tips for Festive Manicures
The holiday season is a time for joy and celebration, and having festive manicures can make you feel even more in the spirit. To achieve beautiful, festive nails that last, proper nail care is essential. Here are some nail care tips to help you prepare your nails for those stylish and cute designs this festive season.
Start with Clean, Healthy Nails
Before applying any polish or nail art, make sure your nails are clean and in good condition. Here’s how to get started:
- Wash Your Hands: Use a gentle soap to wash your hands, removing any dirt or oils from your nails.
- Remove Old Polish: If you have old nail polish on, use a non-acetone remover to prevent drying out your nails.
- Trim and Shape: Use a good nail clipper and a file to trim any length and shape your nails to your desired style. Square, oval, or almond shapes can enhance the look of festive designs.
- Push Back Cuticles: With a cuticle pusher, gently push back your cuticles to give your nails a neat and clean appearance.
Moisturize for Healthier Nails
Nourishing your nails is key to keeping them healthy. Here are a few moisturization tips:
- Apply Nail Oil: Use cuticle oil rich in vitamins to hydrate your cuticles and nails. Regular application can help prevent breakage.
- Moisturize Your Hands: Use a quality hand cream daily, especially before starting any manicure. Look for products that contain ingredients like shea butter or aloe.
- Flexible Base Coat: Always apply a flexible base coat. This will not only provide a barrier but also hydrate your nails while preventing staining from colored polishes.
Select the Right Nail Products
Choosing the right nail products can affect the health and look of your nails significantly. When picking nail polishes and tools, consider these points:
- Opt for Non-Toxic Polishes: Look for polishes that are free from harmful ingredients like formaldehyde, toluene, and dibutyl phthalate.
- Use Quality Nail Tools: Invest in high-quality tools for trimming, filing, and shaping your nails to avoid splintering.
- Look for Seasonal Colors: Explore festive colors and sparkly options that embody the joy of the season.
Keep Your Nails Strong
Strong nails are less likely to chip or break, preventing disappointment during your festive celebrations:
- Limit Soaking in Water: Long exposure to water can weaken your nails. Use rubber gloves when washing dishes or cleaning.
- Take Breaks Between Manicures: Allow your nails to rest between applying polish to reduce weakening.
- Ensure a Balanced Diet: Maintain a diet rich in vitamins and minerals, particularly biotin, to support nail health.
Create Stunning Festive Designs
Now that you have well-cared-for nails, it’s time to create some cute nail art! Some easy designs to try include:
- Snowflakes: Use a white nail pen to draw snowflakes on a blue or glitter base.
- Candy Canes: Stripes in red and white can mimic the look of candy canes.
- Christmas Trees: Use a green nail polish and add tiny ornaments with a dotting tool.
For more festive nail inspiration, check out [Nailit Magazine](https://www.nailitmag.com) (opens in a new window) and [Allure](https://www.allure.com/story/festive-holiday-nails) (opens in a new window) for trending designs.
Protect Your Perfect Manicure
After creating your stunning designs, follow these tips to keep your manicure looking fresh:
- A Top Coat is Essential: Apply a quality top coat to seal in your nail art and add shine.
- Avoid Temperature Shocks: Avoid exposing your hands to extreme temperatures right after your manicure, as this can cause chipping.
- Regular Touch-Ups: Keep an eye on your nails and do minor touch-ups when needed. This improves the longevity of your festive style.
By following these essential nail care tips, you will not only show off cute nails for Halloween but also throughout the holiday season. Take the time to care for your nails, and let your festive spirit shine through!
Easy DIY Nail Art Techniques for Beginners
Embarking on a delightful journey into the world of nail art can be an exciting venture, especially for beginners. With just a few tools and techniques, you can transform your nails into stunning canvases that reflect your personality and creativity. Here are some easy DIY nail art techniques that anyone can try!
Supplies You’ll Need
Before getting started, gather the following supplies:
- Nail polish in various colors
- Nail dotting tools (or a toothpick)
- Nail striping tape
- Base coat and top coat
- Stack of cosmetic sponges
- Scissors
- Cotton balls and nail polish remover
Simple Nail Art Techniques
Here’s a look at some fun methods that will bring out the artist in you:
1. Dotted Nail Design
This technique is super easy and requires minimal tools. You can create polka dots or intricate designs by using a dotting tool or a toothpick. Here’s how:
- Paint your nails with a base color and let it dry completely.
- Dip the dotting tool or toothpick into another nail polish color.
- Carefully place dots on your nails in a pattern of your choice.
- Allow it to dry and finish with a top coat for a glossy finish.
2. Striped Nails with Tape
Stripes can add a chic look to your nails and are simple to achieve:
- After applying your base coat, paint your nails a solid color.
- Once dry, use nail striping tape to create stripes on your nails.
- Apply a contrasting nail polish over the tape and wait a few minutes.
- Carefully remove the tape, and seal the design with a top coat.
3. Ombre Effect
The ombre effect is trendy and surprisingly easy. Here’s a simple method:
- Select two complementary nail polish colors.
- Using a sponge, apply the lighter color to half of the sponge and the darker color to the other half.
- Press the sponge onto your nails, bouncing it gently to blend the colors together.
- Repeat as necessary to achieve the desired intensity, then apply a top coat.
4. Glitter Accents
Adding a touch of glitter can elevate any nail design:
- Paint your nails with a base color and let them dry.
- Apply tape to create geometric shapes or negative space on your nails.
- Sponge on some glitter polish in the designated areas.
- Remove the tape and top off with a smooth top coat.
5. Freehand Nail Art
Feeling bold? Try freehand designs! With a steady hand, you can create anything from simple lines to intricate patterns:
- Start with a base coat and your base color.
- Use a fine brush or a toothpick to draw your designs once the base color is dry.
- Let your creativity flow—flowers, hearts, or abstract shapes can all look fantastic!
- Seal your work with a top coat for lasting shine.
Tips for Beautiful Nail Art
- Always start with a base coat to protect your nails.
- Allow each layer to dry thoroughly before moving to the next.
- Practice makes perfect—don’t be discouraged by early attempts!
Resources for Inspiration
For more inspiration and tutorials, check out these fantastic websites:
By exploring these techniques, you can easily create unique and beautiful nail art. Remember, the key is to have fun and enjoy the process of expressing your creativity right at your fingertips!
Trending Halloween Nail Colors and Patterns
As Halloween approaches, it’s time to embrace the spooky season, and what better way to celebrate than with trending Halloween nail colors and patterns? Nails are an essential part of any Halloween costume and can elevate your festive look. From deep, dark shades to eerie designs, there are plenty of ways to express your Halloween spirit through your nails.
One of the most popular choices this season is the classic orange and black duo. These colors symbolize Halloween and are perfect for creating striking nail art that stands out. Whether you opt for a solid color, a gradient, or playful patterns, you can’t go wrong with this classic combination.
Another trendy color this year is a deep, blood red. This shade adds an edgy touch and works beautifully whether you prefer a glossy finish or a matte one. You can combine it with gold or silver accents for a more glamorous look. Some sprinkling of glitter can also enhance the spooky vibes!
For those who love to push boundaries, using unconventional colors is a great way to showcase your creativity. Shades like dark purple, deep teal, and even rich burgundy can be perfect alternatives to traditional Halloween colors. These hues not only look chic but can be styled to fit various Halloween themes—from gothic looks to elegant Halloween soirées.
Here’s a list of trending Halloween nail colors for 2023:
- Classic Orange
- Jet Black
- Blood Red
- Dark Purple
- Deep Teal
- Rich Burgundy
When it comes to patterns, Halloween offers a range of fun designs that you can easily achieve. Spiders, webs, ghosts, and pumpkins are just a few iconic symbols that can make your nails scream Halloween. You can mix and match these elements either as accents or go for full nail designs. Consider this simple pattern guide for some inspiration:
| Pattern | Description | Best Colors |
|---|---|---|
| Spider Webs | Thin white lines draped across a black nail. | Black, White |
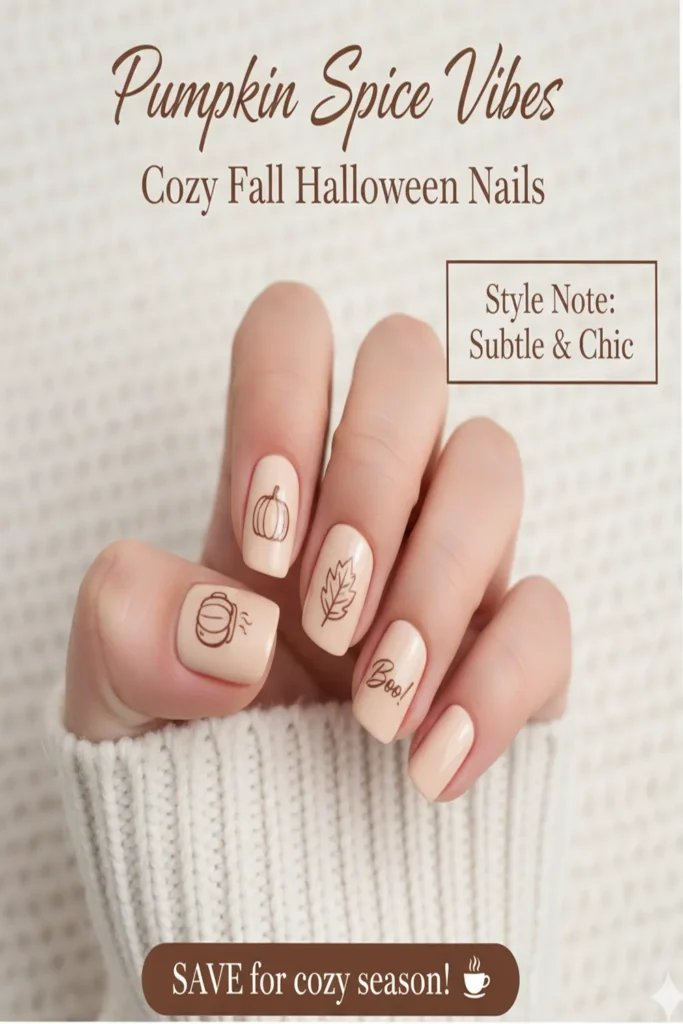
| Pumpkins | Orange base with green vines. | Orange, Green |
| Ghost Faces | Adorable ghosts with tiny eyes. | White, Black |
| Dripping Blood | Red dripping patterns on a black base. | Black, Red |
To achieve your Halloween nail art, you can use different methods. Nail stickers or decals can make the task easier, especially if you’re in a hurry. For a more hands-on approach, consider using nail stencils that will help you create intricate designs without much effort.
If you’re looking to gather more ideas or want to purchase the supplies you’ll need for your Halloween nails, check out Nail Pro for professional tips and tricks. For fun and chic nail art inspiration, Instagram is a treasure trove of creativity.
As Halloween night draws near, don’t forget to accessorize! Consider adding tiny nail charms or pieces that represent Halloween motifs. These small details can give your nail art an extra flair that truly channels the Halloween spirit.
Spooky nail art isn’t just for those attending parties, but it can also give every day a hint of festive fun. So whether you’re heading out for a night of trick-or-treating, attending a Halloween bash, or simply enjoying a festive evening at home, cute Halloween nails can contribute to your overall celebration.
Get ready to show off your Halloween spirit this season with these trending colors and patterns. You’ll be amazed at how your nails can enhance your overall look and add a touch of whimsy to your Halloween festivities!
How to Accessorize Your Halloween Nail Art
Halloween is the perfect time to showcase your creativity, and your nails can be a fun canvas for spooky designs. Accessorizing your Halloween nail art can take your look to another level. Not only can you enhance the overall design, but you can also personalize it, making your spooky style unique. Here are some clever and cute ideas to accessorize your Halloween nail art.
Choose the Right Color Palette
Start by selecting colors that embody the essence of Halloween. Classic choices include:
- Orange
- Black
- Purple
- Green
- Red
- White
Mixing these colors with your nail art can create a festive look. For instance, a black base with orange pumpkin faces can be an adorable yet spooky pairing. You can find inspiration here.
Opt for Halloween-Themed Nail Stickers
Nail decals or stickers are a fantastic way to accessorize your Halloween nail art without much effort. They come in various designs, including:
- Ghosts
- Witches
- Spiders
- Pumpkins
- Skulls
Simply peel and stick them on your nails for an instant Halloween vibe. You can browse different designs at My Nail Art.
Add Some Glitter
Nothing screams Halloween like a little sparkle! You can enhance your nail art by incorporating glitter in various places:
- On tips for a “french” style with a twist.
- Over your base coat for a shimmering effect.
- In the form of nail polish with glitter suspended in it.
Whether you go for a fine shimmer or chunky glitter, it’s sure to make your Halloween nails pop. For more tips on using glitter, check out Color Street.
Incorporate 3D Elements
To really stand out, try using 3D nail accessories. Here are some ideas:
- Small plastic charms (like bats or skulls)
- Rhinestones for a creepy spa look
- Marble effects for a spooky misty design
These elements add texture and dimension to your nails, making them more engaging to look at. Discover more unique 3D accessories at Shop Nail Art.
Finish with a Statement Ring
The right ring can enhance your Halloween nail art. Opt for rings that match your nail colors or themes, like:
- Pumpkin-shaped rings
- Spider-web designs
- Skull motifs
A statement ring draws attention to your hands while complementing your nail art. You can find trendy statement rings online at stores like Etsy.
Use Temporary Tattoos
If you’re looking for a more unique way to accessorize, consider using temporary tattoos. They can be cut and applied directly to your nails. Here’s how:
- Choose a temporary tattoo design that fits the Halloween theme.
- Cut out the tattoo you want to use.
- Apply it according to package instructions.
- Seal with a clear topcoat for longevity.
Remember Aftercare
Taking care of your nail art and accessories ensures they last through the Halloween season. Keep these tips in mind:
- Avoid soaking your nails in water for long periods.
- Use gloves when cleaning or doing chores.
- Apply cuticle oil to maintain healthy nails.
Don’t forget to remove your Halloween nail art safely when the time comes, using a gentle nail polish remover. You can find more aftercare tips at How to Nail Art.
Accessorizing your Halloween nail art opens up a world of creativity. From selecting the right colors to adding 3D accessories, there are numerous ways to show off your spirit. Embrace your playful side and enjoy the spooky festivities this Halloween!
Key Takeaway:
When it comes to celebrating Halloween, your nails can be just as festive as your costume! This article covers a multitude of topics to help you feel confident and creative as you get ready to show off your “cute nails for Halloween.” Here are the key takeaways:
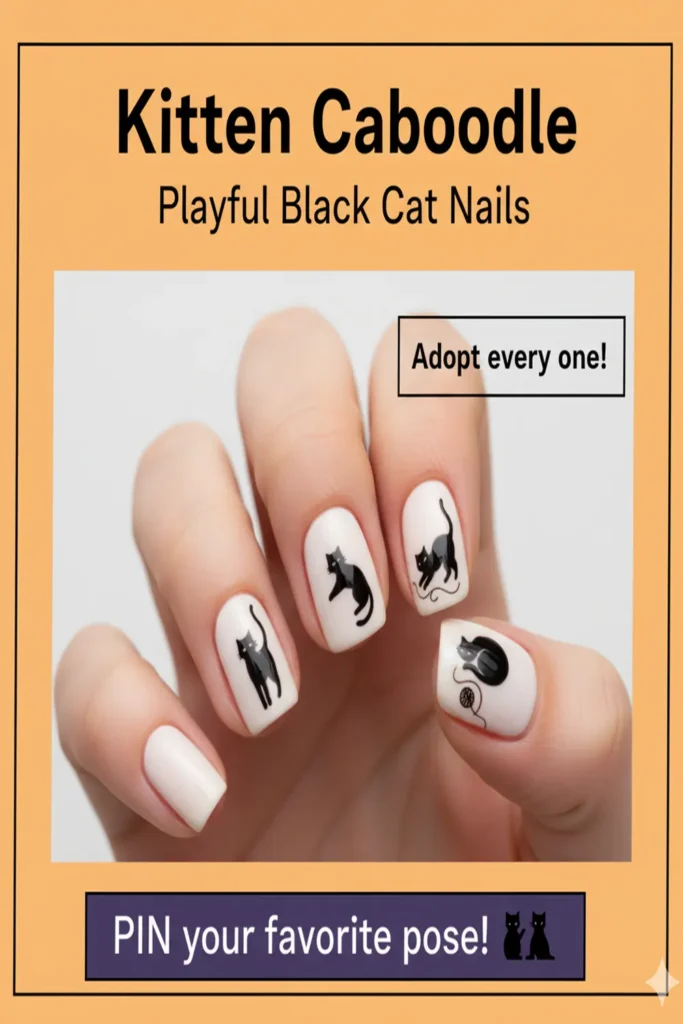
First, we explored creative designs that can make your nails stand out. Cute Halloween nails can feature adorable pumpkins, whimsical ghosts, or even playful black cats. Whether you’re looking for simple designs or intricate patterns, there’s an option for everyone. The goal here is to have fun with your creativity and express your personality through your nail art.
We also discussed essential nail care tips that are crucial for maintaining healthy and beautiful nails. Preparing your nails properly ensures that your Halloween manicure not only looks great but lasts longer. Regular trimming, shaping, and moisturizing your cuticles can go a long way. Remember to use base coats and top coats for a professional-looking finish that protects your designs from chipping, especially during all the Halloween festivities!
For those just starting out, we shared easy DIY nail art techniques perfect for beginners. Techniques such as dotting with toothpicks, using tape for clean lines, or simple sponge techniques can elevate your nail game without requiring advanced skills. With practice, you can create fun and festive designs that you’ll be proud to flaunt.
Next, we highlighted trending Halloween nail colors and patterns that you won’t want to miss. Classic shades like deep oranges, spooky blacks, and vibrant purples are timeless choices. Feel free to mix and match these colors with trendy patterns like stripes, dots, or even metallic finishes to keep your look fresh and seasonal.
The article touched on how to accessorize your Halloween nail art. Adding small charms, gems, or stickers can take your nails to the next level. Accessories can bring an added dimension to your manicure, making your Halloween look even cuter and more festive.
Cute nails for Halloween encompass creativity, care, and a bit of fun! With the right techniques and trends, you can create a stunning look that complements your Halloween spirit. Don’t forget to share your designs with friends and family; after all, Halloween is about sharing joy and creativity!
Conclusion
As Halloween approaches, it’s the perfect time to unleash your creativity and showcase cute nails that capture the spirit of the season. From playful pumpkins to adorable ghosts, there are countless creative designs to inspire your festive manicure. Remember, taking care of your nails is essential to ensure they stay healthy and vibrant while you experiment with fun colors and patterns. Regular maintenance will keep your manicure looking fresh throughout the festivities.
For those new to nail art, don’t hesitate to try easy DIY techniques that allow you to express your Halloween style without feeling overwhelmed. Simple tools and techniques can help you create stunning looks that rival any salon-bought designs. Pair your nail art with trending Halloween colors like deep oranges, rich purples, and sparkling blacks to make your cute nails pop even more this season.
Accessorizing your Halloween nails can elevate your look even further. Consider adding gems, stickers, or themed nail jewelry that complement your designs without overpowering them. These little details can transform a basic manicure into a spooky yet delightful masterpiece.
Ultimately, this Halloween, let your nails be a canvas for your creativity. With the right techniques, color choices, and accessories, you can create cute nails that not only reflect the fun of the holiday but also resonate with your unique style. So gather your supplies, get inspired, and enjoy the process of crafting your perfect Halloween nails!