Halloween is a time for creativity, spookiness, and fun, especially when it comes to nail art. If you’re looking to add a little flair to your style for the season, consider trying out Halloween acrylic nails. They can be simple yet striking, allowing you to express your personality without a lot of effort. In this guide, you’ll find several creative designs for Halloween acrylic nails that are both easy to achieve and delightfully spooky.
Classic Halloween Colors
Start by choosing a color palette that screams Halloween! Traditional colors like black, orange, purple, and green are perfect for this season. You can create simple but effective designs by painting your nails in solid colors or mixing them for a fun twist. Here are some ideas:
- Black and Orange Ombre: Blend black and orange for a gradient effect that looks like a Halloween sunset.
- Purple and Green Stripes: Alternate stripes of purple and green to get a candy corn-inspired look.
- Matching Toes: Don’t forget your toes! Matching nail colors enhance your overall Halloween theme.
Spooky Patterns and Symbols
Patterns can elevate your Halloween nails from ordinary to extraordinary. Here are some patterns you might consider:
- Spider Webs: Create a simple spider web design on a black or dark purple base, using a thin brush to draw the web.
- Jack-o’-Lantern Faces: Paint little pumpkin faces on each nail for a charming yet spooky vibe.
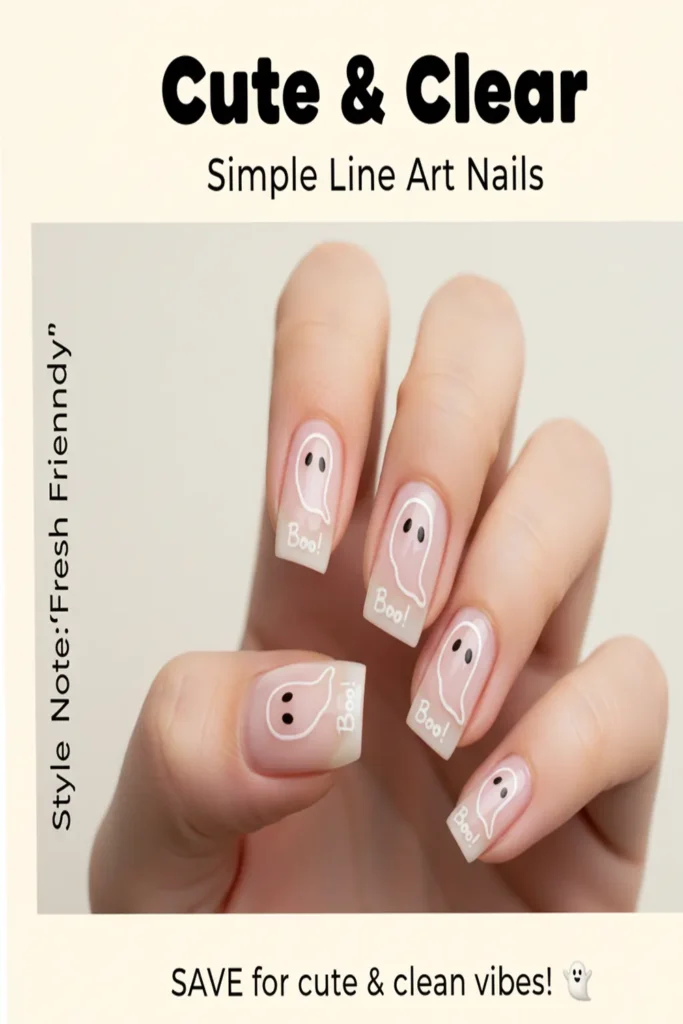
- Skull and Bones: Use white polish to create a simple skull design on a dark background for a classy goth look.
Charming Accents
Sometimes, less is more. A couple of accent nails can help bring your entire look together without overwhelming your design. Consider these accent ideas:
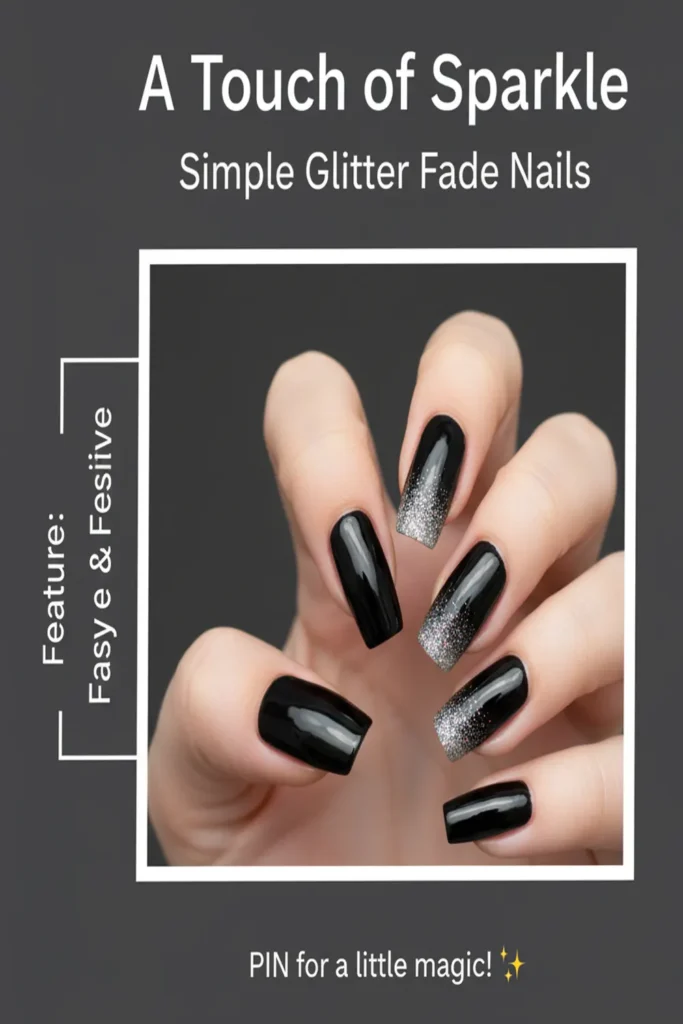
- Glitter Accent: Choose one nail on each hand to be coated in glitter for added sparkle!
- Stickers: Use Halloween-themed stickers like bats, ghosts, or witches on a clear or colored base coat.
- Rhinestones: Add a few rhinestones to your nail designs for extra glam.
Simple Nail Art Techniques
You don’t need to be a nail artist to achieve eye-catching designs. Here are some simple techniques that work great with acrylic nails:
- Dots: Create polka dots on a colored base using a dotting tool or a toothpick.
- Lines: Use striping tape to create clean lines or shapes on your nails.
- Splatter Art: For a spooky effect, lightly splatter white or black paint on a dark base.
Easy DIY Ideas
If you feel adventurous, you can try DIY acrylic nails at home. Here are some tips to get started:
- Learn the Basics: Watch tutorials online or read tips from resources like Nail Hub for guidance.
- Gather Supplies: You’ll need acrylic tips, adhesive, gel polish, and basic nail art tools.
- Practice! The more you practice, the better you’ll get at creating your Halloween-themed designs.
Maintenance Tips
Keep your Halloween acrylic nails looking fresh with these maintenance tips:
- Avoid Harsh Chemicals: Use gentle soap and avoid cleaning chemicals that can dull the polish.
- Regular Touch-ups: Schedule regular appointments with a nail technician to keep your nails looking their best.
- Moisturize: Use cuticle oil to keep your cuticles hydrated and healthy.
With these creative ideas for Halloween acrylic nails, you can express your spooky spirit in style this season. Whether you go for classic colors, fun patterns, or simple DIY projects, you’ll find that the possibilities are endless. Embrace the Halloween magic and have fun creating your nails!
For more tips, check out Hello Nail Art for inspiration or visit Nail Art Gallery for a wide range of nail art examples. Enjoy your Halloween nail journey!
Essential Tools and Supplies for Achieving Perfect Halloween Acrylic Nails
If you want to achieve stunning Halloween acrylic nails this season, you’ll need to gather the right tools and supplies. With the proper items, you’ll be on your way to master the art of creating eye-catching, festive designs that showcase your creativity and add a spooky flair. Here’s a guide to the essential items you’ll want to have on hand.
Essential Tools for Nail Art
To get started with your Halloween acrylic nails, consider the following tools that will help you achieve polished and professional results:
- Acrylic Liquid and Powder: These are the foundation of your acrylic nails. Look for high-quality products that provide a smooth finish and adhere well. Brands like Sally Beauty offer a variety of acrylic systems.
- Brushes: A set of acrylic brushes in various sizes will help you shape and apply the acrylic seamlessly. Flat brushes work well for larger areas, while detail brushes are perfect for intricate designs.
- Nail File and Buffer: To achieve a smooth and even surface, have a coarse nail file for shaping your acrylics and a buffer to refine the finish before applying color.
- Nail Forms or Tips: Depending on your preferred style, use nail forms for sculpting or tips for extending your nail length. They are essential for achieving the perfect shape.
- Cuticle Pusher: This tool helps you tidy up the cuticles, ensuring a clean application of acrylics.
Supplies for Designing Halloween Themes
Once you have your basic tools, you’ll want to stock up on supplies that allow you to create Halloween designs. Here’s what to consider:
- Nail Polish: Look for Halloween-themed colors like orange, black, purple, and glitter shades. These colors will form the base of your spooky designs.
- Nail Art Pens or Brushes: Use fine-tipped pens or nail art brushes to create detailed designs like spiders, web patterns, or pumpkins on your nails.
- Stickers and Decals: These are a fantastic shortcut for those who may not feel confident in their nail art skills. Halloween-themed stickers add instant flair and can be easily applied.
- Glitter and Rhinestones: For added drama, consider using glitter or rhinestones in your designs. They catch the light and enhance the overall spooky effect.
- Top Coat: Seal your art and protect your nails with a shiny or matte top coat. This final step keeps everything in place and adds durability to your acrylics.
Setting the Mood with Nail Preparation
Before you start applying acrylic, preparing your nails is crucial. Here are the steps to follow for optimal results:
- Start with clean nails. Remove any old polish and wash your hands thoroughly.
- Apply a cuticle remover and gently push back your cuticles.
- Shape your natural nails and file them to remove the shine, reducing the chance of lifting.
- Use a primer before applying acrylic to ensure excellent adhesion.
Where to Shop for Supplies
Finding quality materials is essential for achieving Halloween acrylic nails that really stand out. Here are a few places to consider:
- Cosmetic Capital for a variety of nail art supplies and accessories.
- Nailpolis for inspiration and to find highly-rated products from other nail enthusiasts.
- Amazon for all your nail supply needs, from polishes to tools—often at competitive prices.
By gathering these essential tools and supplies, you’ll be well on your way to achieving perfect Halloween acrylic nails. Remember, practice makes perfect, so don’t hesitate to experiment with different techniques and designs! Get creative and have fun turning your nails into a spooktacular Halloween masterpiece.
Step-by-Step Guide to Applying Halloween Acrylic Nails at Home
Getting ready for Halloween doesn’t just stop at finding the perfect costume; your nails deserve some spooky flair too! Applying Halloween acrylic nails at home can not only save you money but also gives you the opportunity to express your creativity. Follow this step-by-step guide to achieve gorgeous Halloween acrylic nails that are simple yet impressive.
Before you start, gather all the necessary supplies:
- Acrylic nail kit (includes acrylic powder, liquid, and a mixing dish)
- Nail tips or forms
- Nail glue
- Nail file and buffer
- Acrylic brush
- Cuticle pusher
- Rubbing alcohol
- Nail polish (Halloween colors like orange, black, and purple)
- Nail art supplies (stickers, gems, or stamps)
- Top coat
Here’s how to apply your Halloween acrylic nails step by step:
Step 1: Prepare Your Nails
Start by cleaning your natural nails. Remove any old polish, and push back your cuticles gently with a cuticle pusher. Buff the surface of your nails lightly to ensure the acrylic adheres well. Clean your nails with rubbing alcohol to remove dust and oils.
Step 2: Choose Nail Length and Shape
Select the desired nail tips based on the shape you want—whether it’s square, oval, or stiletto. Use nail glue to attach the tips to your natural nails. Make sure to press down firmly and allow them to dry completely before proceeding.
Step 3: Prepare the Acrylic Mixture
In a well-ventilated area, pour the acrylic powder and liquid into a mixing dish according to the instructions on your kit. Dip your acrylic brush into the liquid and then into the powder to form a small bead. Make sure you don’t overload your brush.
Step 4: Apply the Acrylic
Begin by placing the bead of acrylic at the cuticle line of your nail tip. Use the brush to spread it down towards the tip of your nail, creating a smooth surface. Repeat the process for all nails, adding more acrylic as needed to achieve your desired thickness. Allow the acrylic to dry completely.
Step 5: Shape Your Nails
Once the acrylic has set, take a nail file to shape the nails. File the edges to your desired shape and finish with a buffer to smooth out the surface of the acrylic nails. This creates a flawless look for your Halloween design.
Step 6: Paint Your Design
This is where the Halloween magic happens! Use nail polish colors like orange, black, purple, or green for your base coat. Try painting pumpkins, ghosts, or spider webs for some festive flair. You can also use nail art stickers or gems that reflect the Halloween theme.
Step 7: Seal their Deathly Beauty
Once your design is complete, don’t forget to apply a top coat to seal everything in. This will not only enhance the shine but also add durability to your Halloween acrylic nails. Allow the top coat to dry thoroughly.
Step 8: Final Touches
Complete your look with cuticle oil to nourish your nails and give them a polished finish. Check your nails for any touch-ups. Make sure everything is smooth, and you’re ready to show off your spooky creations!
DIY Halloween acrylic nails don’t have to be complicated; they can be fun and simple. With practice, you’ll be able to create stunning designs that impress your friends and family. You can find more tips and inspiring designs at Nail Art Gallery or check out Essence Beauty for nail supplies.
Make this Halloween memorable, not just with costumes but with your unique and creative acrylic nails. Embrace the spirit of Halloween and your newfound nail art skills!
Top Color Choices for Halloween Acrylic Nails: Keeping It Simple
Halloween is the perfect time to showcase your creativity, and one of the simplest yet most stylish ways to do so is through acrylic nails. With themes ranging from spooky to whimsical, the color palette for Halloween nails can make a significant impact on your overall look. Here are some top color choices for Halloween acrylic nails that will keep things simple yet fabulous.
Classic Halloween Colors
When thinking about Halloween, certain colors instantly come to mind. These classic shades not only resonate with the season but also keep your nail designs simple and chic. Consider the following:
- Black: A timeless choice, black nails can add a dramatic flair. Pair them with glitter for added sparkle or keep them matte for a sleek finish.
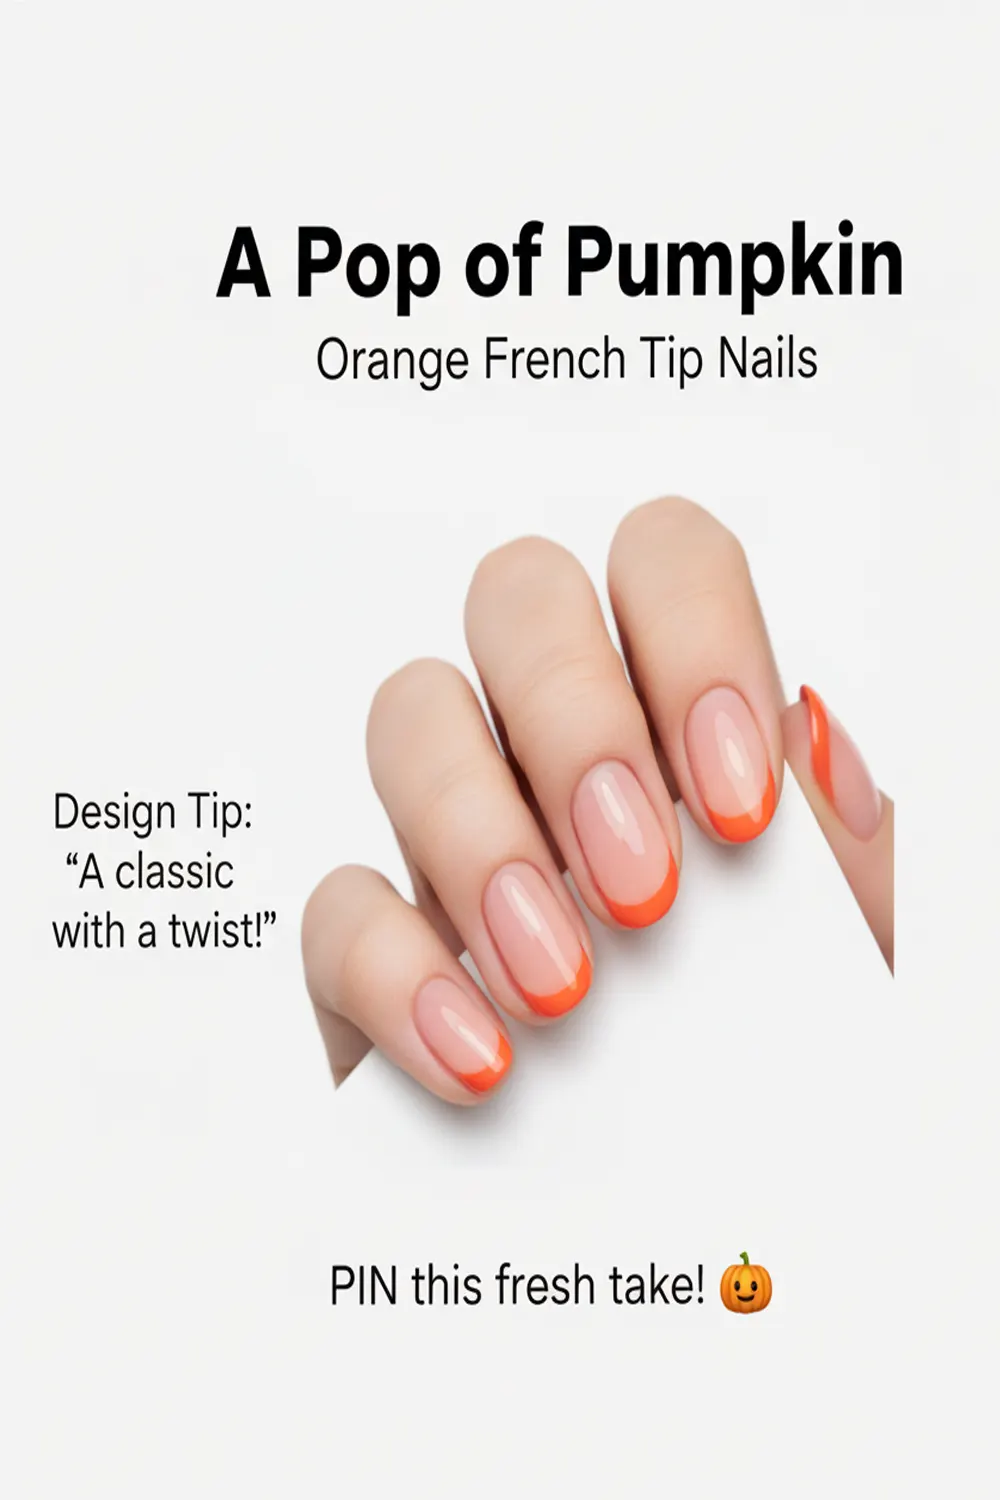
- Orange: Symbolic of pumpkins and autumn leaves, orange is vibrant and fun. This color can be applied as a full nail or used as an accent on a black base.
- Purple: Perfect for witchy vibes, purple offers a mysterious aesthetic. Darker shades like plum can be both elegant and spooky.
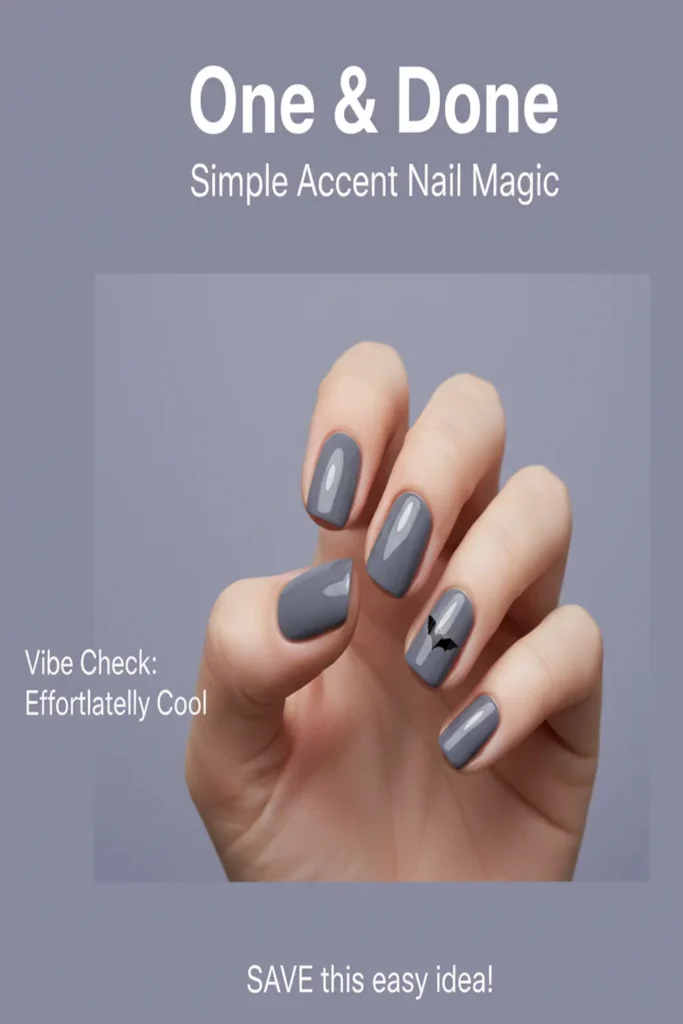
- Green: Think of monsters and Frankenstein! A solid green or even a shimmery emerald can add a playful twist to your Halloween look.
Neutral and Earthy Tones
If you prefer to keep things understated, go for neutral and earthy tones. These options provide a sophisticated look while still embracing the Halloween spirit. Consider using:
- Nude: A nude nail can look incredibly chic, and when adorned with simple Halloween-themed nail art or stickers, it’s the perfect combination.
- Brown: Warmer and softer than black, brown can highlight the season’s earthy elements. Combining it with gold or copper accents creates an elegant fall appearance.
- Gray: This versatile shade can appeal to both minimalists and those looking for something unique. A matte gray can serve as an excellent backdrop for Halloween designs.
Bold and Fun Accents
Don’t shy away from colors that pop! Using bright and playful shades can enhance your Halloween acrylic nails while keeping the overall design simple. Here’s why you might want to include:
- Hot Pink: For those who love to stand out, hot pink can be a fabulous choice. Add spooky stickers for a fun twist.
- Turquoise: This unexpected shade can make your nails look fresh. Pair it with white for ghost designs or jack-o’-lantern faces.
- Red: Passionate and bold, red can convey a more sophisticated and edgy vibe. Whether it’s classic red or a vampire-inspired shade, it can be a winner for a Halloween event.
Easy Nail Art Ideas
To keep things simple yet engaging, consider using nail art techniques that don’t require a lot of effort. Here are some popular ideas:
- Polka Dots: Use a contrasting color to create polka dots on a solid background. They’re easy to replicate and very festive.
- Stripes: Adorn your nails with simple stripes. Use tape for clean edges.
- Spooky Stickers: Halloween-themed stickers are a quick way to jazz up your nails without complex techniques.
Choosing the Right Finish
Don’t forget about the finish! A matte finish can create a modern look, whereas a glossy finish can evoke a more traditional vibe. Ultimately, the choice is yours based on the design style you’re going for.
For inspiration and more ideas about Halloween acrylic nails, check out popular nail design sites such as Allure, and Nail Design Code. These platforms showcase a range of styles, ensuring you find something that sparks your creativity this Halloween.
Choosing simple yet appealing colors for your Halloween acrylic nails allows you to celebrate the season with flair. Remember to have fun experimenting with different shades and designs!
Maintenance Tips for Your Halloween Acrylic Nails: Ensuring Long-Lasting Designs
If you’ve decided to adorn your nails with Halloween acrylic designs, you’ve made a fun choice that can elevate your festive spirit. However, to keep those spooky shapes, vivid colors, and playful patterns looking great throughout the season, maintaining your acrylic nails is essential. Here are some tips to help you ensure your Halloween acrylic nails remain vibrant and last longer.
Keep Your Nails Clean
Regular cleaning is crucial. Keep your nails free from dirt and debris to maintain the aesthetic appeal and promote nail health. Here’s how you can clean your nails:
- Wash your hands regularly, especially after handling food or engaging in outdoor activities.
- Use a soft brush to gently scrub your acrylic nails and the skin around them.
- After cleaning, always dry your hands thoroughly to prevent moisture buildup.
Avoid Harsh Chemicals
Halloween acrylic nails are designed for durability, but exposure to harsh chemicals can weaken them. Here are some substances to avoid:
- Acetone-based nail polish removers
- Bleaching agents or strong detergents
- Household cleaners that contain ammonia
Instead, opt for natural cleaning products or gentle alternatives to preserve your nails’ integrity.
Moisturize Regularly
Keeping your cuticles and the skin around your nails moisturized can greatly improve the appearance of your Halloween manicure. Try the following:
- Apply cuticle oil daily to nourish and protect your cuticles.
- Use a hand cream regularly to keep your hands hydrated.
- Consider powders and lotions specifically designed for acrylic nails.
Be Gentle with Your Nails
Acrylic nails can be strong, but they still require gentle handling. Use these practices:
- Avoid using your nails as tools for opening packages or cans.
- Be careful when typing or using your phone to prevent unintentional pressure.
- When washing dishes, consider using gloves to protect your nails from hot water and heavy detergents.
Maintain a Proper Length
Longer acrylic nails can be more beautiful but also more susceptible to breakage. Here’s how to find a good balance:
- Trim your nails to a manageable length every few weeks.
- If you notice any splitting or lifting, consider shortening them earlier.
- Request a fill-in appointment every two to three weeks to keep the overall look neat.
Protect Your Design
Your Halloween-themed designs add festivity, but they also need protection. Here’s how to keep your nail art intact:
- Use a top coat to seal designs and create a barrier against wear.
- Apply a fresh layer of top coat every few days if needed.
- Avoid using your nails on rough surfaces to maintain the clarity of your designs.
Consult a Professional for Repairs
If you experience breakage or lifting, it’s advisable to see a nail technician. Self-repairs can sometimes worsen the situation. Professionals can:
- Evaluate the extent of the damage.
- Perform repairs without risking further injury to your natural nails.
- Suggest alternative nail designs that may require less maintenance.
Following these maintenance tips will help your Halloween acrylic nails shine all season long. For additional insights and nail care tips, jump to Nails Magazine and explore what experts have to say.
To find tutorials on various acrylic designs or maintenance videos, visit My Nails Gallery. You’ll find techniques to help preserve the design of your Halloween nails.
Embrace the Halloween spirit and let your creativity shine, but don’t forget to care for your acrylics! With a little maintenance, you can flaunt your festive nails confidently and stylishly.
Key Takeaway:
When it comes to creating the perfect spooky look for Halloween, your nails can make a striking statement. This article covers several essential aspects to consider for Halloween acrylic nails, ensuring that you achieve stunning designs that are both simple and eye-catching. Here are the key takeaways from the topics discussed:
Creative Designs for Halloween Acrylic Nails focus on simple, yet effective styles that capture the Halloween spirit. From classic spooky motifs like ghosts, bats, and pumpkins to more subtle thematic ideas using color and glitter, you do not need to be an expert nail artist to create something impressive. These designs can be tailored to fit any skill level, making them accessible to everyone looking to enhance their Halloween look.
Essential Tools and Supplies are crucial to achieving salon-quality results at home. Having the right acrylic nail kit, brushes, and accessories can streamline the process and save you time and frustration. Make sure to stock up on quality base coats, topcoats, and colors that align with your desired designs. This step is essential to ensure your creations look polished and professional.
The Step-by-Step Guide to Applying Halloween Acrylic Nails at Home is a roadmap for both beginners and seasoned DIYers. Following systematic instructions can help you avoid common pitfalls and mistakes. Starting with proper nail preparation and adhering to each application step ensures that the nails remain intact and beautiful throughout the Halloween festivities.
When it comes to Color Choices for Halloween Acrylic Nails, simplicity can be effective. Familiarize yourself with classic shades like orange, black, and purple, but don’t shy away from adding unique touches, such as metallics or glow-in-the-dark polishes, to enhance your designs. Color selection can dramatically affect the overall aesthetic and help to convey the Halloween theme in a chic and uncomplicated manner.
Understanding Maintenance Tips is vital for ensuring your Halloween acrylic nails look good longer. Basic upkeep, like avoiding harsh chemicals and keeping your nails hydrated, will prolong the life of your designs. Regular maintenance not only helps in maintaining your look but also keeps your nails healthy.
Halloween acrylic nails can be a creative and enjoyable project for anyone willing to try. By focusing on simple designs, using the right tools, following a mindful application process, selecting the right colors, and maintaining your nails, you can achieve a stunning Halloween nail look that elevates your overall costume and adds a touch of spooky flair to your festivities. Happy decorating!
Conclusion
As Halloween approaches, expressing your creativity with simple yet spooky acrylic nail designs can enhance your festive spirit. By exploring various creative designs, you can find inspiration that suits your style and makes a statement without being overly complex. Essential tools and supplies play a crucial role in achieving that salon-quality look at home. Investing in high-quality items can make your DIY nail art process smoother and more enjoyable.
Applying your Halloween acrylic nails can seem daunting, but you’ve now got a step-by-step guide to simplify the process. Following these instructions, you can confidently create designs that will impress your friends and family. When it comes to color choices, remember that sticking to a few classic hues can keep your nail art sophisticated and visually appealing. Deep oranges, emerald greens, and spooky blacks are always popular, and when used thoughtfully, they can amplify your Halloween ambiance.
Maintaining your acrylic nails is vital for enjoying your festive flair for the entire season. Simple care tips ensure your designs last longer, allowing you to focus on enjoying Halloween festivities rather than worrying about nail chips or wear. With the right techniques and tools, you can create stunning Halloween acrylic nails that embody the spirit of the holiday. So gather your supplies, unleash your creativity, and let your nails add that extra touch of spookiness to your Halloween celebrations! Happy nail designing!